
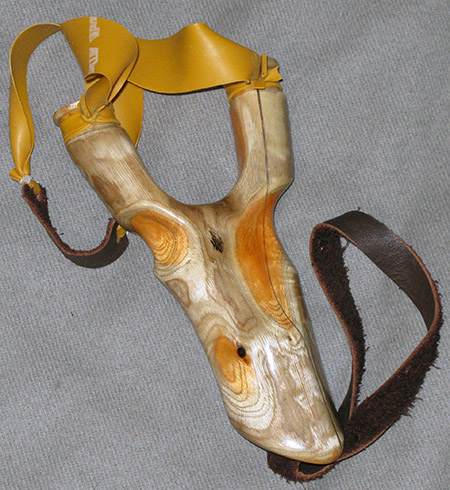
Slingshot reader Vana2 made for me of buckthorn wood.
This report covers:
- Starting off
- A new skill
- Setup
- Aim small: miss small
- Connecting
- Keeping my shots higher
- Angle of the slingshot frame
- Missing the box
- Results
- Bottom line
- Summary
Today I get back to practicing with the slingshot that reader Hank made me and I make significant progress. I also want you to know that this exercise is really helping me with my shooting in general.
The future
I’m having a “my first piano recital” experience with this slingshot. In the short time I’ve been working on it I have learned many things, some of which I will share with you today. I can see that learning is occurring.
Starting off
The first thing I will say is something I should have said in the last report. I don’t want to let too many days lapse between shooting sessions, as there are things that, once learned, will boost you forward the next time you pick up the slingshot. And you need to keep these things fresh in your mind and experience — hence the need to shoot often.
I continued to use clay balls in this session. I think after I become somewhat proficient with them I’ll switch to steel balls in the middle of a shooting session and see what sort of difference they make.
A new skill
I have recognized that shooting a slingshot is a new skill, and if I want to master it, or to at least become competent, I need to keep shooting. That means I have to prepare for the worst, which I think is the day one of the two elastic bands snap. So I went online and bought twenty sets of bands that come with leather pouches already attached. My only job will be to attach them to the slingshot frame when the time comes.

Twenty sets of elastic bands with leather pouches attached cost me around $25. That’s probably a lifetime supply.
Setup
I shot with the target box set up the same way this time as in Part 4. That’s the target box sitting on a tall table with a blanket behind it to shield the wooden fence. The only difference was, instead of a 12-inch Shoot-N-C target. I used an 8-inch one this time. Aim small; miss small.

I used a smaller Shoot-N-See bull this time.

Aim small: miss small
Halfway through the session I started concentrating on the red center of the bull — making it my aim point. I would like to show you a shot-up center but I can’t. I do know that I hit the bull more times in the second half of the session, and I attribute that to concentrating on the red bull aim point.
I began shooting from 15 feet back, but I missed the target box with the first two shots, so I moved up to 12 feet for the next few shots. Yes, just that small difference has an effect, because I only missed the box one more time later on in the session. And I called that one before I shot. But after I started hitting the target I moved back to 15 feet.
Connecting
My first few shots connected with the box below the target. I probably hit it 6-7 times before connecting with the target the first time. But once I began connecting with the target I kept the shots mostly inside the Shoot-N-C bull from that point on. I missed it and hit the box another 9 times throughout the rest of the session.
Keeping my shots higher
Last time my shots hit below the bull and also a little to the left. So I concentrated on that this time by watching where I held the slingshot, relative to the target. I also resisted the urge to lower my slingshot holding hand in place after the shot. I also did not push that hand forward after the release. Since that hand is pushing forward already this latter issue is bigger than you might think.
My feet I turned more to the right. It helped but didn’t correct everything. I still shot a little to the left, but not as much.

I concentrated on holding the slingshot higher by aiming the bottom fork at the target. Surprisingly, the balls hit the target.
Angle of the slingshot frame
This is something I need to work on for next time. It is easy to twist the slingshot in the hand that holds it so it’s not parallel to the target. If you do that you throw off the flight of the ball, because the elastic bands will not be stretched equally. I’m concentrating on holding the slingshot parallel to the ground, and this becomes one more thing I have to consider. Hank — help, please!
Missing the box
I said earlier that I missed the box one more time during the shooting session. This time I knew I was going to miss and I also knew which way the ball would go.
Here is how it happened. Every time I put a ball in the leather pouch I had to work to get the ball centered. It wanted to rest on the high side of the pouch, which became the right side when I tilted my hand that was holding the frame over to the right. To see what might happen, I purposely shot the slingshot with the ball almost coming out the top or right side of the pouch and it went about 6 inches to the right of the box from 15 feet. That allowed me to see the ball hitting the blanket backdrop, so now I knew for sure that these clay balls will not penetrate the blanket. I also know that the balls have to be centered in the leather pouch.
Results
I didn’t count the balls I shot, but I’ll estimate there were at least 30. I count at least 15 holes in the target and at least 13 new holes in the target box. I know I missed the box three times so that totals (15+13+3), or 31 total shots. That’s close enough. That means I hit the target with about half the shots. Most of the shots fired were from 15 feet, so I was just as accurate this time as I was from 10 and 12 feet last time. That’s an improvement.

The target after the session. I count a possible 15 hits, though there could easily be more.
Truth be told I do believe I shot through the same hole several more times than it’s possible to count. If I was in doubt I counted the lesser number of hits.

This is what I mean about the difficulty of counting the holes in the target. The two holes on top are obvious, but the holes at the bottom left aren’t. I counted them as two shots, but they could easily be three.
Bottom line
Here is where the rubber meets the road, folks. In Part 4 the target was 12 inches in diameter. Today’s target is 8 inches in diameter — two thirds the size of the previous bull. I hit a smaller bull from farther away roughly the same number of times out of just a few more shots. I am getting better.
Summary
I hope you were able to follow me through today’s discussion without too much confusion. If that is the case you can see just how challenging this pocket slingshot really is.

Tom,
Keep those bands in a cool dry place to prevent them from degenerating before you get to use them. A light dusting of talcum powder might also help preserve those bands.
Siraniko
“… you can see just how challenging this pocket slingshot really is.”
B.B.,
Yes, I definitely can! When I first got my slingshot from Hank, I started shooting at about 5 feet, shooting at the bottom of a empty cat food can (no shortage of those at a house that does cat rescue =>), yet still missing the can (about 3″ diameter) entirely at that short distance. However, I had a trap with a dark background, and I could see where the shiny 3/8″ stainless steels balls were going. I’m not a “dead-eye shot” like Hank, but to even get to the point where I could hit the can with 8 out of 10 shots at 15 feet…well, that took me hundreds of shots! Fortunately, the trap captured my ammo so it could be re-used…that helped a lot. 😉
Blessings to you,
dave
P.S. Fortunately, you’ve got enough bands to fire thousands and thousands of shots! 🙂
B.B.,
What Siraniko said.
I would also put them in either a sealed (O-Ring) metal tin and purge it with Nitrogen or throw in a few Oxygen absorber packs.
Speaking of the new bands and pouches; i see air dump holes on those pouches like on aircraft speed brakes and a larger centered hole.
IF I were you i would keep one of the New lifetime Supply out and install it promptly on the beautiful Hank Slingshot frame. “Why when the bands I have are perfectly usable!” B.B. says to self.
shootski however thinks, “B.B.’s ammo will be centered by the big hole and the flutter of the current no holes piece of leather belt will go away…B.B. will see a jump in accuracy once he finds the MoJo of the new bands and pouch!”
What will B.B. do? Will he be cheap or will he be experimental?
And Now for the REST OF THE STORY!
Stay tuned READERS…
shootski
shootski,
Oxygen ABSORBERS??? I know about the dangers of O2 and elastic. But the absorbers are news to me.
BB
Tom Gaylord (B.B. Pelletier), I’ll let shootski tell you about rusty teabags but, in the meantime, what “… dangers of O2 and elastic..”?
I had a look for-, but failed to find anything on theraband degradation by oxygen.
——————————
What I did read, was:
detach theraband after every time of using it (wow!)
don’t stretch it more than three times it’s length
keep it in a cool area, ie no extreme temperatures
and somewhere dry and
dark, ie not in direct sunshine
avoid prolonged contact with chlorinated water (rinse it off)
throw theraband away if it’s damaged in any way, even just very slightly
———-
That was a website about using theraband for exercise, not shooting. 🙂
I guess, instead of detaching it after (!) every use, I’ll just have to inspect extra closely before (!) every use. 🙂
The stretching limit is, I think, handy to know. When making my own band, I should aim for a quarter of the length of my maximum draw distance. 🙂
By the way, I have tried to cut my own theraband strips and it was not easy – until it was! 🙂
Because I had read that it’s best to use a roller knife, I tried a pizza cutter… yeah, I know, forget about it! 🙂
Scissors didn’t really work for me either, because I found it impossible to achieve a long neat cut!
Then I tried a very sharp blade, which puckered the theraband more than it cut. 🙁
But I found the answer online:
a video clip that showed how easily theraband can be cut, after it has first been taped down, eg I used clear tape to stick my theraband onto my cutting mat, marked the cutting line and used a straight edge to guide my sharp craft knife blade.
AMAZING! 🙂
——————————
But back to the beginning and my request: would you tell me/ us how oxygen affects elastic please? Thanks. 🙂
hihihi,
A rotary blade knife is the best way to cut band material. The larger the diameter the better it is. They can be found at craft stores and fabric stores.
https://olfa.com/collections/professional/products/olfa-45mm-rty-2-dx-ergonomic-rotary-cutter
Hank
Thanks Vana2. Good to see an example of a rotary blade knife.
So, size does matter after all – I knew it all along! 🙂
———-
I do not have such a rotary cutter, yet, and so I can’t compare.
Good news is, I found the video clip. In less than a couple of minutes, you can see what I’m on about:
https://m.youtube.com/watch?time_continue=27&v=z0gFqHsMkFM&embeds_euri=https%3A%2F%2Fwww.bing.com%2F&feature=emb_logo
In case the link doesn’t work, the video clip is on youtube (sorry!), called “HOW TO CUT THERABAND GOLD WITHOUT ROTARY CUTTER AND CUTTING MAT”, posted by G:C:U:K (GAMEKEEPER CATAPULTS U:K)
What do you think? 🙂
hihihi,
Oxygen is not so much an enemy of elastics. The true enemy of any elastic material is actually ultraviolet light exposure (present in sunlight). The presence of oxygen just exacerbates the problem if exposed to UV light.
Siraniko
Ah Siraniko, thanks for that explanation. 🙂
I know that elastic is not the same as plastic, but I thought it might be similar. And so, I thought I was going to learn how oxygen destroyed my precious ice hockey boots!
They were made of some black plastic and fitted me incredibly well, giving magical confidence on ice! They were never exposed to direct sunlight as I only used them in an indoor arena.
However, within a few years of darkness/ storage in their bag, they had turned to cold dark chocolate. What I mean is, they had become brittle.
The way I found out was, while I was happily skating along, within an instant, my sock was flat on the ice, swiftly followed by all of me… 🙂
Picking up the pieces, I found that I could just snap off bits of boot with my fingers, just as if it were a black chocolate sculpture. I want to place a smiley here but I now realise that I’m still in mourning… 🙁
hihihi
Same thing happened to my high end downhill ski boots and I was on a ski lift when the heel of one boot slid off the ski binding. I got off the lift okay and felt the melted gooey chunks of plastic. Not much fun skiing down to rent boots.
Deck
Oh No!
Decksniper, that sounds worse than my experience. So, is that why you now like to ski cross country? 🙂
hihihi,
My first set of Alpine plastic boots were Lange Comps on a pair of ridiculously long HEAD Metal skis back in the mid sixties..
What do you think Cross Country Ski Boots are made of these days, Leather with three holes on the Schnabel?
Think again! I bought my last XC 100% leather boot in 1980. Back Country and Touring XC boots switched to plastic a decade or so later.
The thing that kills the plastic used in ski boots is how much plasticizer must be used to keep them bending in the VERY COLD conditions. People store their boots in places that have temperature swings which releases the plasticizer leading to either the chocolaty goo or the brittle stuff that shatters or has parts fall off in the VERY COLD on the lift or at top of the mountain.
I get maybe 75 days of skiing out of my Salomon S Lab XC boots; both Skate and Classic. My Alpine boots get maybe two seasons; just about the time they feel like they fit perfectly. I usually have two pair of each so they get disassembled plastic inside and out gets cleaned with Dawn® dish detergent. Liner and foot bed are dried 100% on a boot dryer system. My Roller Ski boots get maybe a season before they are trashed. With each pair of boots that go in the trash i lose a little bit of my heart…i refuse to wear ill fitting boots and will sell ones that give me hot spots let alone hurt like some folks put up with. As soon as i find replacements that fit perfectly they are gone to be sold as used boots. Fortunately the Last that Lang and Solomon build their boots on seem to be perfect for my foot shape and size.
shootski
Thanks shootski, for your interesting comment. 🙂
Plasticizer, eh – hmm, sounds like oil evaporating out of an oil-derived product, ie plastic.
Maybe plastic footwear would last longer if stored submerged in an oil bath (same type of oil it was made from). 🙂
BB
Just a thought,, but do you think putting a few of them in a zip lock bag and sticking them in your freezer might make them last, better? I know that sunlight can affect rubber negatively,, but I don’t know if it does the same to Theraband strips.
The problem is the experiments like this take years to complete,, so no short term answers.
As a question from a non slinger, does the fact that your hold of the pouch is not aligned with the forks make a difference? I can see a slight twist in the bands in the picture. I am guessing, here, and I suppose I am going to be forced to get a slingshot of my own, now. Would that be considered enabling?
Ed
Tom Gaylord (B.B. Pelletier), I wish I was over at your place. 🙂
Then I would distract you with something, like “please don’t think me rude but, would you make me another coffee please”, while I quickly clamp your backstop blanket across the fence corner. And then, for something to aim at, in the middle, I would suspend my shoelace with something small tied on the end, eg a leaf. I bet that coffee would be Well worth your initial annoyance! 🙂
And then, just for fun, I would want you to experience those clay balls, impact a very hard surface, like hitting the flat side of one of those bricks in the corner. The whack, explosion and the little leftover pile of clay are just too much fun to miss! 🙂
Yep, I speak from experience now!
In fact it’s the, having-tried-out-a-new-toy-for-the-first-time and boy-this-really-is-much-harder-than-I-thought experience… 🙂
B.B.
Yes, I image keeping the legs of the sling shot evenly spaced toward the target would be difficult.
I also assume that if the legs were spread apart further that this would be much easier.
So Hank, are wider legged slingshots easier to shoot? Thanks,
-Yogi
Yogi,
If you are holding/shooting correctly you don’t need wide forks (2 to 2 1/2 inches is lots) and the width doesn’t make shooting easier but it can influence things.
If you sight using the top of the fork for reference, the width of the frame (relative to your anchor point) will determine the (vertical) trajectory of the ball so some frames will shoot “better” for you than others.
I shoot “by feel” without using the frame for reference – I focus only on the target. This has the big advantage that changing frames doesn’t affect my shooting much as I (subconsciously) make my compensations based on the tension I feel in the bands. It only takes a couple of shots to acclimatize to a different ball weight.
Practice is what makes shooting easier 😉
Hank
Hank,
Okay, now that’s the kind of stuff I was asking about. Instinct shooting has always been the way I shot slingshots. I’m gonna try it next time.
BB
BB,
You might want to try a lower anchor point.
Hank
Load, aim, fire. No thinking involved….
After awhile muscle memory takes hold. 10,000 hours later….lol.
-Y
Yogi,
Come on Yogi!
Only 800 hours a year or so!
shootski
BB,
You have learned so much since your last session. Paying close attention to what you are and are not doing will help you learn what you should and more importantly should not do. The same things apply to archery, air rifles, firearms, etcetera. This is what was meant when said learning to shoot a slingshot will help you shoot an air rifle better.
Soon, doing what works will become “instinctive” and you will amaze even yourself.
Tom,
Near the end you were writing about how you are definitely improving as you were hitting a bull that is 2/3 the size, roughly the same number of times (from a farther distance). It is even better than that – good old “Pi R Squared” has your new bull having an area of just about 44% that of your prior bull, so your “shot density” is more than double where you were before. Your cone of shot variation is dramatically reduced!
Great Slinging!
Alan McD
Alan,
Thanks. I knew that pi R squared, but since all my pies are round I forgot.
“We like pi, we like it fine — 3.14159!” A quote from John Lithgow on Third Rock from the Sun.
BB
Mrs. FM sez at her high school in North Carolina there was a physics teacher who would say “the square root of r is damn many.” Precisely.
BB,
Hard to help based on a picture and a few comments. Wish I could watch and suggest in real time.
I’d recommend changing your shooting setup as hihihi recommend – hang the blanket loosely in the corner of the fence and use a small aim-point (at eye height!) as a target. Set the blanket up to collect the balls to make them easier to retrieve.
I know that you like to have a target to photograph for the blog but the target and the box are not important at this stage and are working against you.
First thing I’d say is stand close – ten feet close – and stay there until you can shoot 4 to 6 inch groups consistently. Only then take a single step back and start again. Expect to shoot alot and often to develop your form and shot cycle (breathing, draw release)… 30 shots is just a warm up for the practice session 😉
Multiple short sessions are better that one long one. Best to use 6 balls, shoot them then stop and relax as you go to retrieve them for the next round. This gives you a break to loosen up, get your breathing normalized and regain your focus. Think of your 10 meter pistol practice.
I concentrate of one thing at a time, working at it until it feels natural then add the next piece. It’s hard to fix everything at once.
Hope this helps!
Hank
Hank,
I will consider all you have said, but as you mention, this has to be a report that all can read and see.
BB
Maybe record video, and grab stills from it for pictures later when you’re writing?
BB-
I think it might be best to go shoot a few rounds of trap. Gotta stop aiming and start pointing. ‘It’s all in your head, man’- wisdom conferred upon me by a stoner corporal many decades ago.
B.B. and interested Readership,
I’ll answer this here rather than up above: “Oxygen ABSORBERS??? I know about the dangers of O2 and elastic. But the absorbers are news to me.”
As you read through the linked information you will run into the word CORRODE which usually is a synonym of rust which as Siraniko points out happens with the help of UV spectrum light as a catalyst in the case of typical elastics. Get rid of the catalyst and usually the process slows down significantly just as removing the corrosion inducing element Oxygen.
https://www.ace-laboratories.com/latex-vs-rubber/
This is all SPECULATION since we don’t know the chemical makeup of the Lifetime Supply of bands B.B. bought.
I will speak to the pouch. The holes in speed/dive brakes on aircraft reduce aerodynamic flutter. The holes in hand paddles used by swimmers do the same thing but in water. I thought about drilling holes in my Euro Style kayak paddle blades but switched over to Wing Paddles before i did the deed. With the Euro Style paddle if you try to pull the paddle too hard the water will spill from one edge and then the other causing the paddle shaft to twist to and fro in your hands; the blade flutters (for you flying geeks it is STALLING due to excess Angle of Attack). My wing paddles are airfoil shaped and although you could stall the paddle blade it will just stall (lose lift) in one direction and not flutter.
Back to the slingshot pouch: in addition to reducing or elimination of pouch flutter the holes also reduce the Mass of the pouch which works (f = ma) to the good.
shootski
BB
One more thought before I start my search for the perfectly forked branch.
When you are practicing, the holes are big enough that you can see where each shot has gone. Would it be advantageous for you to try to ignore POI and simply concentrate on form and “sight picture”. That is, not trying to correct for each missed shot.
That way you might find a “grouping” of holes that might lead to a better insight into the process.
Ed
When I saw what a nice slingshot and kit, reader ‘Honest Bobs Used Car Sales’ had got himself (see his comment below “Shooting a Hank slingshot: Part 4”), I wanted one too. And now I’ve got three. 🙂
I bought a small and a big slingshot (from hattila) and when Vickie (girlfriend) told me, she had a roll of theraband that I could have, I felt the urge to make one as well. 🙂
And now I’ll get to my observations that this comment is really about:
I started shooting my clay balls with my “Easy slingshot, ideal for children and beginners”. And the thing I kept hitting, was my knuckle – OUCH! – OUCH!! – OUCH!!! – etc… 🙁 Maybe I should have bought a slingshot at least one difficulty level lower… 🙂
To continue the fun but with less pain, I looked for- and cut out a forked branch, attached a couple of theraband strips and tied on a bit of leather in the middle. That was quite enjoyable and the result may not be pretty and may not work too well, but, at least it taught me a thing or two for the next one! 🙂
Then I tried my big slingshot, which has the word “PRO” in it’s name, but all I cared about, was the arm- and hand guard part of it’s design. Now that thing was really easy and fun to shoot! 🙂
I have a theory about why I kept whacking myself with the beginner slingshot and not so much the others: the little blue pouch is too small for my fat fingers and the clay balls. The other pouches are much wider and act indeed like pouches.
Also, the blue leather strip is so short, that I have to hold it by the knot/ theraband attachment in front.
Finally, I think that little hole in the centre of the blue pouch is too small to keep the clay ball centred after release/ during acceleration (maybe this perforation is only meant to aid folding). I gave my homemade brown leather pouch as big a hole as I dared and I also applied softener (Neatsfoot Oil) – lovely to touch and a good clay hugger. 🙂
pictured are the three pouches and clay balls for size
hihihi,
Some slingshot designs (called PFS Pickle Fork Slingshot) have very short forks and require a special technique to shoot without hitting the frame or your hand.
If you’re getting frame or thumb hits you are probably holding the slingshot canted (out of square) to the target or it’s the way you are holding the pouch.
You might want to view these videos…
https://youtu.be/wLC25Sssr-0
https://youtu.be/bC_HIAzehJE
Hank
Thanks Vana2 for your help. I watched those videos and then some. Now I think I know what I’m doing wrong: everything. 🙂
I would really like to see you raise that target 18 inches, or in other words, eye level and see what your results are.