
by Tom Gaylord
Writing as B.B. Pelletier*
This report covers:
- The project
- Attach the pan to the board
- Now the duct seal
- Finished trap
- Put trap inside a box
- Time?
- Bottom
- Future of the trap
I know that many of you readers are craftsmen, so today’s blog may disturb you a bit. You see, old BB is going to build something. I had a problem and found a very good (read that as cheap) way to solve it. I call it the Right Now pellet and BB trap.
One of the pastors at my church has a 9 year-old son who is very interested in guns. He’s a shy kid until he starts talking about guns. Then his eyes light up and he gets excited. I feel like I am looking at myself, threescore years ago.
I have been giving the boy my old gun magazines and he is soaking them up like a sponge. I also gave him a couple gun books that he and his father read together. His dad is not a gun guy, either, so I’m really working with two pupils here.
A couple weeks ago I spoke to the boy’s mother, and discovered that she is behind what I’m doing all the way. She sees that the subject of guns is one her boy is interested in and she wants to do all she can to encourage him.
Well — I had to do more than just give him books! And I was in a unique position to do so. I asked his dad if he would like to shoot with his son, which is how I learned so much about the dad’s background. The boy has a Crosman 760, which is pretty nice for a young boy, but I wanted him to have something a little better. I found a vintage Diana 25 that is ideal for him, but that brought up another problem. Where is he going to shoot it?
I didn’t want to spring for a pellet trap, so I pondered the problem until one day on my daily walk I happened to spy an old aluminum frying pan someone had thrown out. It was in the trash beside the curb for weekly pickup. I took it and a very nice hardwood cutting board that was lying next to it (someone was moving and had cleaned out their kitchen).

This pan and cutting board were in the trash.
This looked like a quick solution to my need for a pellet and BB trap. Fill the pan with some duct seal and you’re done!
The project
First I drilled out the rivets holding the handle to the pan. When they were free I drilled two holes on opposite side near the other side of the pan — away from the handle holes. The handle holes would be at the base of the trap and the two holes I drilled were at at the top.
I also cut a piece of wire coathanger to run through the two holes at the top of the pan. The ends stick out about 1-1/2 inches on either side when the wire is run through both holes.

The three parts of the trap. You can see the holes that were drilled at the top of the pan for the wire.
Attach the pan to the board
I originally thought the board would just rest loosely behind the pan, but if they were attached it would be neater. You would only have to pick up one thing to move it. So I drilled two holes through the pan and the board and attached them with two bolts. I chamfered the back side of the board so the bolts sit flush, but that isn’t necessary.

Pan attached to the board with two bolts. The angle of the picture doesn’t show that the pan lip is even with the bottom of the cutting board.
Now it’s time to attach the wire target holder. Run the wire through the holes drilled at the top of the pan.

Run the wire through the two hole drilled at the top of the pan.
To attach the wire, simply twist each end to take up the slack. Try to get the wire tight across the pan.
The wire was wound tight on both ends, so it looks like this.

Twisting the wire on each end tightens it.
Now the duct seal
It’s time for the duct seal. I put about 5 lbs. into this 9-1/2-inch pan. That fills it to a depth of about 1 inch. So the Diana 25 that shoots 177 RWS Hobby pellets at about 620 f.p.s. will be stopped by an inch of duct seal, with an aluminum pan behind that and half an inch of hardwood behind that. It should be very safe!

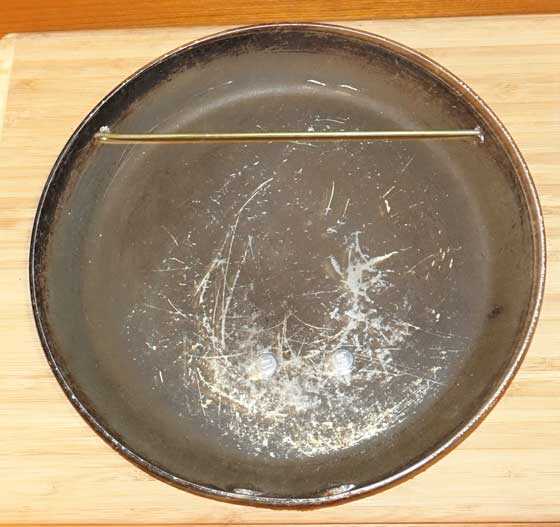
The duct seal is pressed into the pan.

It takes a few minutes to smooth out the duct seal.
Finished trap
All that remains is to put a binder clip on the wire target hanger at the top and clamp in a target. You will have to press the duct seal out of the way to get the clamp in place, but people shouldn’t be shooting at the clamp anyway.

The trap is finished. The targets stick to the duct seal naturally, so tape isn’t needed.
Put trap inside a box
Duct seal is fairly clean in use but pieces will break off and come out of the trap with use. So, cut down a cardboard box to set the trap inside to collect those stray pieces. The trap can lean against the wall or you can make a stand for the back, but make sure it will fit inside the box as well.
Time?
I call this the Right Now trap, because it took me one hour and 15 minutes to do everything seen here, plus taking all the pictures and putting away the tools and cleanup. The only cost was the duct seal, which is about $2 a pound or a little less. I buy it 20 pounds at a time to keep the cost low.
If you can’t find a pan in the garbage, look in a local thrift store. They can’t be much.
Bottom
After finishing the trap I mounted a flat board the bottom. Now it stands up by itself. That added another 20 minutes to the project, but I think it’s almost necessary for a good trap that’s useful everywhere.

By mounting the trap to a board it now stands up by itself.
Future of the trap
If the pastor and his son decide they like shooting they can always buy a better pellet trap — though I doubt they can improve much on this as a BB trap. A trap like this will easily last for a half million rounds, if it is cleaned periodically and if the guns are no more powerful than the Diana 25. The duct seal does need to be replaced every 50,000 shots or so.
I have a couple traps like this with that kind of shot count (half a million) on them — or nearly so. In fact I may build another one of these for myself, because the design is so much more elegant than the homemade traps I have been using.


B.B. you have my respect for reusing the garbage of others. I still regret that my current council doesn’t have a, “pick up day” twice a year, and instead gives each household 2 free dump passes. It is a terrible waste.
B.B.
Do you put apiece of plastic over the duct seal when not in use so it does not dry out? How often do you dig out the lead?
-Y
Yogi,
Duct seal doesn’t dry out like modeling clay does. You dig out the lead when it balls up and starts kicking lead back out.
B.B.
That panned out well, a neat pellet trap from recycled items.
Mercury,
Rim shot and cymbal crash here, I think! 😉
B.B.
B.B.,
I like the repurposing idea. That is good enough to get the job done. You will have to keep us posted with regards to your mentoring project. Having you as mentor would be like hitting the lottery for several hundred million! 🙂
I have done a multitude of pellet traps, including ones that use duct seal. Both of my indoor traps are repurposed 1/2″ OSB crates that have 2″x2″ wood in (all) corners. Steel plate in the back. Hole cut in the front. All of the pellets fall right to the bottom as well as bb’s. bb’s get the magnet and pellets get a quick sweep up and are given to a re-loader/fisherman who does some casting. How can duct seal w/copious amounts of lead be disposed of?
I recycle everything. Paper towels are the only thing that get burned. Plastic food bags and such get tossed in a Walmart bag, compressed and taken to work. 1 week may yield a compressed soccer size ball of non-recyclables. No trash bill.
Years ago I saw 4-6″ fence post made from recycled materials. They would hold a nail as good as wood and never rot. I have never seen them since. That would seem to be a good use for non-recyclable products, though I think that “melting” would be out. Perhaps a “cold” process that might involve heat and compression and some melting chemicals/binders?
Enough of all that. Nice job. 🙂
Good Day to you and to all,… Chris
BB,
Pretty neat. I could see a couple of additional bends in the coat hanger to hold the target out from the putty, but not really necessary. That pan should be able to stop some pretty good stuff for a while. Do warn them to move their targets around some to keep from stacking projectiles up.
RR,
I gave the gun and trap to the pastor last night. I did talk him through cleaning the target. He was as excited as I expect his son will be.
B.B.
B.B.,
Now you will have to find a way to make that booklet on teaching a person to shoot printable on demand. Probably a companion volume would be on the use of iron sights followed by the use of a scope. A beginning shooter should have a bigger backstop behind the target to protect whatever is in the general area behind the target, just as an added measure of safety for everybody.
Siraniko
Siraniko,
Boy — if I had a way of doing that, it would be wonderful! But I’m stretched now as thin as a drumhead and people keep asking for more.
B.B.
B.B.
Out of the frying pan and into the fire! What a lucky family to have you as a mentor!! Talk about getting started off on the right foot!!
Carl
Carl,
Buh dum bump! Crash! (that’s a rimshot, followed by a cymbal crash). 🙂
B.B.
BB ,
I am glad too see it when people get into the sport this way , having a good mentor helps them enjoy it and avoid some of the pitfalls of incorrect equipment and developing bad habits. The best benefit of belonging to any club is the mentoring and help that the more advanced shooters give so willingly. I just gave my nieces a Daisy 25 and a Red Ryder , the look of happiness was worth it alone .
Gene,
Yeah, that look is what I hope to see. I got it from the father last night. 🙂
B.B.
My first gun was a Daisy BB gun, but the first gun I actually shot at targets and strived for accuracy with was a Crosman 760. It was a good start, but I eventually realized I could shoot better than it could and I needed something more accurate to progress further. Lots of memories–and pumping!
I’m a retired 64 year old geezer and have maybe 15 airguns. Many are multi-pumps, as I like the built in self sufficiency and ease of shooting. Yeah, a springer has the former, but not the later in my hands. About a year ago while at Walmart, I found that a Crosman 760 had jumped into my cart. Too lazy to go put in back on the shelf, I took it and gave it a home. I got the cheapest version without the pitiful 4×15 scope many lower level airguns come with.
I still shoot my other air rifles of course, but when I want to step outside for some target shooting, often as not, I take that 760.I shoot it mostly at 7 yards due to the smooth bore. I mounted a decent 4×32 AO scope on it, and go to town. BB’s don’t shoot well enough in it to suit me at all, so I always shoot pellets. Late yesterday afternoon, I wanted to just take a few shots, and took the 760. It was already getting dark. I sat down at my shooting table with small portable rest, and set my home made wooden pellet trap at the usual 7 yards, and loaded 5 of the Crosman Wadcutters, 7.4 grain, into the magazine, and proceeded to shoot them using my usual 8 pumps. I got a beautiful little cloverleaf group. Center to center is about 3/16-1/4 inch, I haven’t taken a measurement yet. You can only see three holes touching, and 2 of the pellets went through existing holes. Yep! She’s still on! The group was ever so slightly high, but easily within the smaller than a dime sized bull I use a black magic marker to draw. I decided, there was no way I could top that, and it wasn’t high enough to justify messing with the elevation knob, so I packed it back up and called it a day.
I’ve said it before, but I am amazed at the shooting pleasure I am getting with this $30 air rifle. 2000 plus pellets and not a hint of a problem. For practical uses, I use it as a 7 yard night ratter, as it has the accuracy at that range.
I fully intend to wear this 760 out, and buying a new one the next day. I put a TKO muzzle brake on it that I had bought for another air rifle, so it’s quite stealthy too. It IS pretty picky about pellets, but actually seems to getting less so with more shooting. It’s also getting more accurate.
I have an acre and can shoot whenever I want to without having to haul my stuff in my car.
BB,
Projects like this are why I can’t turn around in my garage. I pick up other folks junk because I know I can make something with it, I just pick faster than I can make ! 🙂
By the way, I did the same thing about 2 months ago that your friend did. I shot through my trap and started chipping away at my basement wall. My trap is about 16″ square and I may not have known what was going on had I not read your buddy’s tale here. Had to go with much thicker steel and redistribute the duct seal.
Half
Half,
I did the same thing years ago in my office. In think I’ve shown the back of the trap that failed.
B.B.
Today’s blog illustrates the importance of remembering the three p’s of posting, proper, practical, and polite. We never know who’s reading. I think a picture of the lad using the trap would be awesome to see!
Carl
B.B,
That’s way cool; Mike and Frank (from American Pickers) would be proud of you for re-purposing stuff! =>
And that’s awesome that you are helping another young shooter find his groove.
Years ago, when his son was six, our pastor asked me for advice about a first airgun for him
Our pastor is not a shooter of any kind, and had no idea where to start; but he knew I was a gun guy.
I gave him a Daisy Avanti model 499 along with the Avanti shot (& told him never to buy cheap BBs for it!).
And as you did here, I also made him a trap for it.
First, I gave the gun to Dad, and taught him how to safely shoot it, so that he could then teach his son.
(I gave him the gun after church, and we shot it out behind the church; we’re in Georgia, so it was OK =>)
His wife later told me that Mom, Dad, Son, and Daughter all took turns shooting it in the backyard.
If “the family that prays together stays together,” then the family that prays ‘n’ shoots together is even better off! =D
take care & keep up the good work,
dave
Thedavemyster,
” we’re in Georgia, so it’s OK” is some funny stuff, I don’t care who you are!
BTW, your state is about 300 crappie lighter since last week. Oh, yeah! I thought it was warm in the south !
Cool; I’m glad the fishing worked out for you, even if the weather didn’t!
This is the coldest “spring” I’ve seen in years!
Excellent Idea B.B.!
I see “junk” as “material for projects” and have a large box of “good for something” stuff. There are a couple of large frying pans in there that just might end up as target butts 🙂
Hank
Hank,
I have 2 large boxes full. One is labeled “Garage” and the other is “Basement”. I’m planning to have “Attic” built this Summer.
Half
B.B.,
Your “pellet pan” is an excellent example of necessity being the mother of invention. Well done! A variation dawned on me: substituting a brownie pan for the skillet.
Michael
Michael,
Be sure it is a heavy duty brownie pan. You do not want to end up shooting through the back of it.
RidgeRunner,
Good point. They tend to be two to two and a half inches deep. Would 2 1/2 inches of duct seal be enough?
Michael
Michael,
I shot through 1 1/2 inches of duct seal, an old VCR cabinet from back in the day when they were steel, folded in two, and a half inch of plywood. It was mainly because I kept shooting mostly at the same 2 or 3 inch area with PCPs up to 30 ft/lbs at 12 yards. Shooting at different areas is key to longevity. Or put another way, variety is the spice of a pellet traps life. 😉
I recently got a 3-12 X32 bugbuster scope. I am getting a POI shift when shooting at 10 yards vs. 50 yards. It is shooting to the left at 50. when I go back to 10 it is right on target. I also have to hold under instead of holding over to hit the target at 50 yards. do you think this scope is defective? Are side Focus Scopes more problematic than front Focus? I don’t think it is a cant issue and I never had this problem with other scopes.
John
Are you in the upper range of your elevation adjustment when shooting at 50 yds?that can be a problem with some scopes.
No. I shimmed it so I wouldn’t be at the upper range.
John,
At what distance are you sighting in your scope? You should sight in at 20-25 yards with an airgun. If your POI is off just a .25″ at 10 yards, it will be off 1.25″ at 50 yards. If you were off .125″ at 10 yards, you’ll be off .625″ at 50 yards. That is the reason to use a longer distance to sight in the scope. Does this make sense?
Also, when you sight in at only 10 yards the pellet is still rising and will continue to rise to the apex of the trajectory. This is easier to understand with a graph so I will post one for you. This graph is dependent on the weight and speed (fps) of the pellet as well as other factors, but it gives you the idea.
Geo
I did sight it in at 10 yards for now. When I get to the range I’ll be able to do 20.
Johncpen,
The scope is fine. It’s not aligned with the bore, left and right. That is a very common thing.
You have the gun zeroed at a strange range. Ten yards is too close. Nothing else will be on. Zero it at 20 yards
I’ll try that. I still have the other question as to whether side Focus Scopes are as reliable as front Focus scopes. Thanks
Johncpen,
They are every bit as reliable. They are favored by the world’s finest airgun marksmen in field target.
B.B.
Johncpen,
There was a blog reader who went about testing various scopes and claimed to have found less variance in quality and better repeatability with the side focus scopes compared to the adjustable objective scopes.
Siraniko
Siraniko,
I could be wrong, but I think Calnib.
Chris USA,
Thanks for jogging my memory. Yes it was reader Calinb with his Leopold Zero-Point testing the various scopes including the higher end brands.
Siraniko
thank you. I found him and asked him the same question. I’m beginning to think it’s the scope since I have no problems at all with the 3-9 X32 bugbuster on the same rifle
I will zero at 20 yards later. In the meantime, I shot 10 yards and was accurate but when I changed the focus to 50 yards but still shot at 10 yards the pellet was now impacting to the left consistently.
Johncpen,
I’m pretty new to this too, but I think the focus is also supposed to remove the parallax error as well. That only works if you have the target in focus ( more or less ). So unless you have a rock solid cheek weld, your eye may be in a different place behind the scope and it is introducing parallax error into your shots.
If I’m misunderstanding parallax please fell free, anyone, to straighten me out.
John,
I read your comment before and it did not sink in,… until now. Why would you have everything adjusted for 10 yards and then readjust for 50 yards,… and then (still) shoot at 10 yards? Adjust your AO and be done with it. But,.. adjust it for whatever yardage you are shooting at. Make the picture clear. Also, a set 40 on the wheel will a 50 on another day due to temperature.
I only did that to see if turning the focus was causing the point of impact problem. in other words I was taking the different distances out of the equation
John,
I see quite a bit of good replies to your question. I see what you are trying to do/see. Like BB said, the rail can be a bit off from the barrel. You can turn one or both ring 180 degrees, swap the rings and also rotate them in the swapped position,.. but do only one thing at a time. It could be in the rings.
When adjusting AO, turn past where it is clear and then back. The idea is to do the final adjustment the same way each time. For example, your final sight in will be (always) in the clockwise movement,… to compensate for any “slop” in the gears/rail/track.
Get some adjustable rings that can shift the barrel/scope rail relationship. Windage compensating I believe they are called.
(If) shooting the same way each time,… with the same pellet/gun/scope/yardage and scope adjustment procedures,… just note the vertical shift at different yardages,.. the same as you would note hold overs at different distances. In other words, a cheat sheet for horizontal hold off as well as vertical hold over/under.
50 yards is a fair distance. A lot can happen in 50 yards.
I am not a turret turner. I use hold over and under to adjust for different distances.
Geo had some good Chairgun info. for you. If you a have a chrony, that is nice. The more accurate you can set things in the program, the better. Once you have it set,.. (only) play with the sight distance or zero, (I forget what it is called exactly), and you will see your curve expand or shorten and rise and fall in relationship to your kill zone setting. I use 1″. At the bottom is also a bar that will shorten or lengthen. It will also break in the middle and if you look at the graph, you will see that the pellet has risen above your kill zone.
What you want is that pellet to stay in the kill zone for as long as it can! Your setting could be 27 yards, it could be 33, it could be 45. Keep changing that (one) setting until you have stretched out the kill zone. Once found, (that) is what you sight in at. Anything other than that, and you have compromised full usage of that 1″ kill zone.
That is about all of the ideas I have for you.
Thanks for the feedback. It’s very helpful.
John,
One other thought,… you have seen BB shoot (different pellets), but change nothing else. Some land low, high, left or right. Is the scope bad? Is the rail off from the barrel? Some pellets just do better at longer distances. The first thing I focus on is,.. can a pellet group at distance? I do not care where it hits. Then when happy, I adjust what I can from there.
There is/can be the effect of a pellet doing an (ever widening) spiral or cone effect. An exaggeration would be at 20 yards it would land at 3 O’clock, 25 at 6, 30 at 9 and 35 at 12. There is a name for it, but it escapes me at the moment. Nothing is wrong,.. nothing changed,… that is just what the pellet does.
4th paragraph,… just note the (horizontal shift), not vertical shift.
BB—-Here are 2 of my favorites- —- one mans trash is another mans treasure— and—laziness is the mother of invention—I can prove the veracity of this one, with a personal experience, if requested.—-Ed
Personally, I like traps noisy and mobile. My colleagues from our air gun club loved to use old cell phones and household wares as traps. Destruction adds some appeal to airgunning to many.
We had an array of old pans to use as traps, but we hanged them instead. Making them to spin was fun.
Greetings
Anthony,
That IS a fun way to plink, as long as there is a berm behind everything and as long as clean-up isn’t necessary. Dump sites are great — plus they often have good targets there already.
Michael
BB,
A variation along the same theme is to just hang the skillet up by the handle.
BB
Nice trap. Like I say. Simple but effective.
B.B.
This looks awesome I’m going to make one thanks
Bill
B.B. This looks neat going to try to make one
Bill
The two comments man the site said something weird about contacting the administrator so not sure if it posted Bill
Buckaroo,
I’m getting wierd messages when I post too. Is anyone else having trouble?
Buckaroo,
I’m getting weird messages when I post too. Is anyone else having trouble?
Mr. Gaylord:
Now you’ve gone and done it. Built a pellet trap for a 9 year old junior? Next thing you know you’ll be embellishing it with a three a three position stand.
And as that junior gets older, if he hasn’t done so already, he’s going tell all his friends in his church youth group what you did. And then you’ll have 10 to 12 more juniors wanting to shoot with you.. Sooner than you can say “air rifle” you’re going to have a church sponsored BSA or FFA or 4H shooting crew on your hands and a 10 meter range in the church hall..
WELCOME TO RIFLE COACHING MR. GAYLORD.
You’ve gone down the slippery slope Mr. Gaylord. Just remember, the name Crew .357 is already spoken for. You’ll have to settle for something like “BB’s X RINGERS”
Trust me (or don’t ai you so choose) rifle coaching and instruction will only takes an hour a week of your time.(And if you believe that I’ve got a bridge and a quit claim deed waiting for you too.) 🙂 🙂 🙂
Respectfully,
William Schooley
Rifle Coach
Crew .357
Chelsea, MI
Mr. Schooley,
I had to laugh at your observations. There is probably a (whole) lot of truth to your comment. It will be (quite) interesting to see how things progress.
William,
Out church is about the reactivate a Royal Rangers unit, and marksmanship will be one of the things we do. So, I’m on it! 🙂
B.B.
Mr. Gaylord:
Congratulations!! And good luck with the reactivation efforts.
As your Royal Ranger unit reactivates, would you please keep all the faithful readers of the Airgun Blog informed about your progress and challenges.
I’ve had the privilege to be involved in the start up of two BSA Venture Crews, one chartered to a Lutheran church and the other chartered to an American Legion Post. And I’ve found that the development and arch of each crew was totally fulfilling but totally unique.
It would be very interesting to hear about your experiences in developing a new unit and it’s juniors shooting and marksmanship program.
A bit of coach to coach sharing, “sell” the fun of shooting to the boys and “sell” college shooting sports scholarships to the boy’s parents. It’s worked well for me over the years
Respectfully,
William Schooley
Rifle Coach
Venture Crew .357
Chelsea, MI
William,
I coached a marksmanship unit with the Izaak Walton League in the ’90s.
B.B.
Ok it finally arrived seems like it is going to need a reseal job but I’m pumping transmission conditioner in it as we speak. Even if that helps might as well get it back to as new condition internally. It has a few scratches on the receiver the barrel is a little dirty but I can see the rifling I’m going to run a few patches through it and see what comes out. I really like how it feels in the hand. That peep is pretty small but it’s sunny here today and I feel I can use it without having to enlarge it. I’m pretty happy with it the forestock has some tiger stripe and is nice looking.
Coduece
Cool gun.
Pyramyd AIR,
I very much enjoy reading the blog daily. Then I continue reading all the comments throughout the day and into the evening. I just wish it was easier to follow the comments. I usually read the comments directly below the blog, but then I go to the RSS feed to view new comments posted in previous blogs, or comments that have been made in the current blog but not necessarily at the bottom of the comments.
Here is the thing that bugs me. I can view the comments efficiently but if I want to reply to a comment, I have to login before I can make my reply. Once I am logged into the blog if I then go to my RSS feed and click on a comment to read it, I am not taken directly to that comment. I have to search for it using Ctrl+F and enter the time stamp in the search field to get to the comment. If I log out of the blog, then when I click on a comment in the RSS feed, I am taken directly to it every time. So I have to keep logging in and then logging back out every time I want to reply. The logging in and out constantly is a work around to the problem. It would be really nice to not have to do that to read the comments efficiently. I am sure I am not the only one that finds comments difficult to navigate.
It seems like in the past the comments worked correctly without the having to log in and out. Well, time to log back out so I can read more comments.
Geo
Geo,
Not a computer expert like yourself, but I usually stayed logged in and have no trouble using RSS Comments and can click on them and be taken to back whatever blog it was,… 10 years old,.. and reply immediately.
Beyond that,… I have not a clue.
Chris USA
I think I found the solution to my problem of not going directly to the comment when I am logged into the blog. The problem, as I stated, is if I am logged in and I right click on a comment to open it in a new tab, it does not open to the comment I clicked on. The comment will be somewhere down the page and then I have to search for it.
Solution: I opened my profile page. There an item on the page named “Toolbar” with a box to check to “Show Toolbar when viewing site”. I unchecked that box and now the comments appear to be working correctly and I go directly to the comment when I click on it.
Because you said that you had no trouble using the RSS comments, I started looking for the cause of mine not working correctly. I thought it was an issue with the way the blog was working but instead it was just a little box that needed to be unchecked. 🙂
Here is a screenshot showing the toolbar option and the box I unchecked.
Geo
Geo791,
When I log into WordPress there is a small tick box in the lower left hand corner. It says either says, “Remember me” or “Keep me logged in” Have you tried clicking that? The other choice is to left click on the comment to open in another tab, you might find yourself still logged in.
Siraniko
Siraniko,
I found the solution to my problem. See the reply I made to Chris USA above. Thank you for replying.
Geo